At Plunge Pools Sydney, we specialise in installing high-quality precast plunge pools for Sydney homeowners who want a compact, durable in-ground pool that suits smaller urban backyards. Our team manages the entire installation process, from planning approvals and engineering checks through to excavation, crane placement, plumbing, and final commissioning. With extensive experience installing plunge pools across Sydney, we understand the access challenges, soil conditions, and council requirements that can affect pool construction.
In this guide, we will explain the complete precast plunge pool installation process in Sydney, step by step. You will learn how precast pool shells are manufactured, how sites are prepared for delivery, how cranes safely place the pool into position, and what happens during plumbing, electrical work, landscaping, and safety compliance before the pool is ready to use.
What Is a Precast Plunge Pool?
A precast plunge pool is a small concrete swimming pool made off-site in a factory and delivered to your property as one complete shell. The shell is reinforced with steel, formed in a mould, cured under controlled conditions, and then transported to the site for installation.
This is different from a traditional concrete pool, which is built in the backyard over a longer period. With a precast pool, the main structure is already complete before it reaches your home. That makes the installation process faster, cleaner, and easier to plan.
How a Precast Plunge Pool Shell Is Manufactured
A precast concrete plunge pool shell is built in a specialised factory using engineered reinforcement and high-strength concrete designed for long-term structural durability.
The manufacturing process typically includes:
- Steel reinforcement cage construction
Structural steel reinforcement bars are assembled into a cage that strengthens the pool shell and prevents cracking under ground pressure and water load. - Precision moulding
The reinforcement cage is pl - Concrete pouring and compaction
High-strength concrete is poured into the mould and vibrated to remove air pockets, ensuring a dense and structurally sound shell. - Controlled curing process
The concrete cures in a controlled environment where temperature and moisture levels are monitored to maximise strength and durability. - Quality inspection and finishing
Once cured, the shell is removed from the mould and inspected for structural integrity before preparation for delivery.
Because this process occurs in a factory rather than a backyard construction site, precast plunge pool manufacturing allows for consistent engineering standards, stronger structural quality, and reduced construction variables through innovative production techniques.
Delivered and Installed as a Complete Pool Shell
One of the key advantages of a precast concrete plunge pool installation is that the entire structural shell arrives on site as one complete unit.
This means the main concrete structure does not need to be built in the backyard.
Instead, the installation process typically involves:
- Excavating the pool area
- Preparing a compacted base or concrete foundation
- Delivering the precast pool shell on a specialised transport truck
- Using a crane to lift the pool shell into position
- Completing plumbing, filtration, electrical systems, and landscaping
Because the pool shell is already constructed, the on-site work is mainly focused on placement, connection, and finishing, which significantly reduces installation time compared with traditional concrete pools.
For many homeowners, a precast plunge pool can be installed within days rather than months, depending on site access and project complexity.
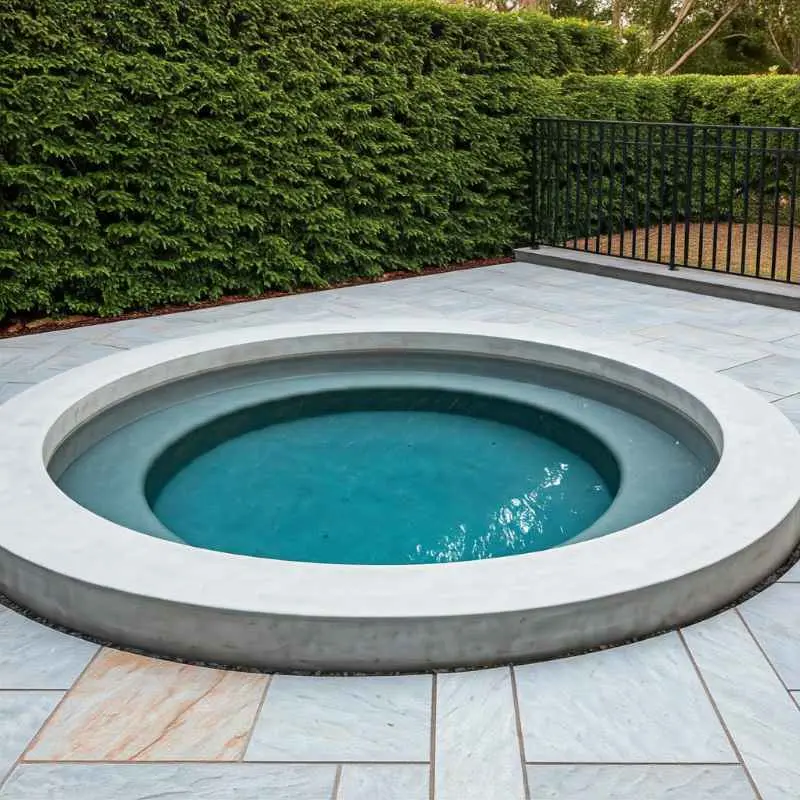
What are precast plunge pool sizes?
Precast plunge pools are typically designed for compact residential backyards and urban properties, making them ideal for homes with limited outdoor space.
Common plunge pool shell sizes include:
| Pool Size | Typical Use |
| 2.5 metre plunge pool | Ideal for very small courtyards or narrow backyard spaces |
| 3 metre plunge pool | A popular option for compact suburban backyards |
| 4 metre plunge pool | Offers additional relaxation space while remaining space-efficient |
| 5 metre plunge pool | Suitable for families wanting a larger plunge pool experience |
These pools are designed primarily for cooling off, relaxation, hydrotherapy, and social use, rather than long-distance lap swimming.
Because plunge pools require less water volume, smaller filtration systems, and less excavation, they are often a more affordable option for smaller residential blocks.
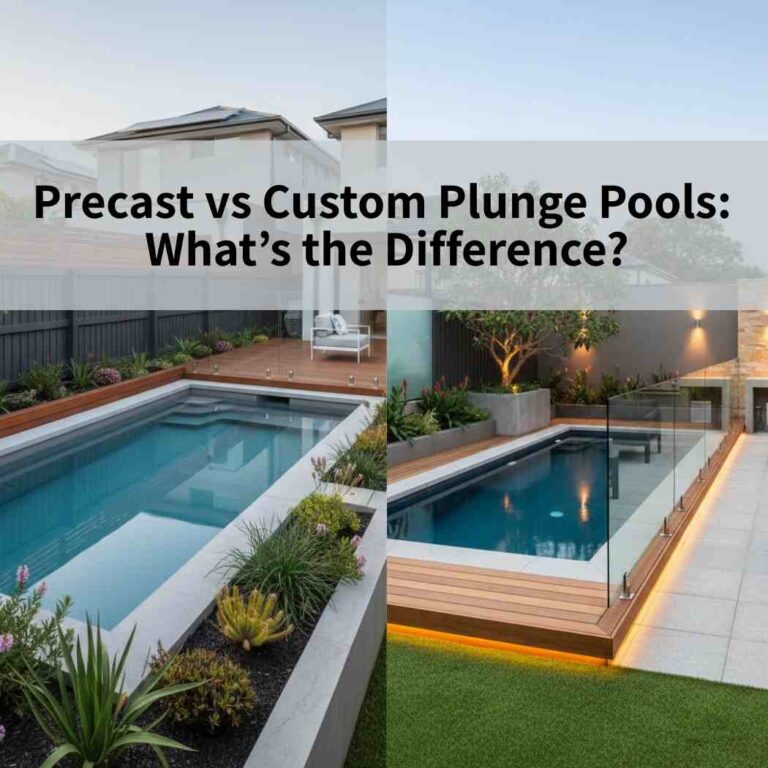
Precast Plunge Pools vs Traditional Concrete Pools
Although both pool types use reinforced concrete, the construction process and installation timeline differ significantly.
| Feature | Precast Plunge Pool | Traditional Concrete Pool |
| Construction location | Manufactured in a factory | Built entirely on site |
| Installation time | Often installed in days | Can take several months |
| Structural consistency | Controlled factory conditions | Influenced by site conditions |
| Backyard disruption | Minimal excavation and shorter works | Longer construction process |
| Project predictability | More predictable timeline | Weather and site delays are possible |
For many Sydney homeowners, the main benefits of a precast pool are faster installation, better predictability, and less disruption at home.
Why Homeowners Choose Precast Plunge Pools
Homeowners choose precast plunge pools because they deliver the durability of a concrete pool with a much faster installation timeline and far less backyard disruption.
Below are some of the main reasons why many homeowners prefer precast concrete plunge pools for small backyards.
Faster installation
A traditional concrete pool must be built in stages on site. That takes time. A precast plunge pool shell is already complete before it arrives, so once excavation and base preparation are done, the shell can often be installed in one crane lift.
Less disruption at home
Most of the heavy structural work happens off-site in the factory. That means less time spent on major construction in your backyard. For many families, that means less mess, less noise, and a simpler build.
Consistent structural quality
Because the shell is made in a controlled factory setting, it can be produced with consistent curing conditions and quality checks. This helps create a strong and uniform reinforced concrete shell without compromising on quality.
Suits small Sydney backyards
Sydney backyards are often compact, especially in urban and inner suburban areas. Precast plunge pools are designed for small outdoor spaces, making them a practical option where a full-sized pool may not fit.
Works well on tight-access sites
Some Sydney homes have narrow driveways, limited side access, or closely spaced buildings. In many cases, a crane can lift the shell straight into place, which helps on sites where a standard pool build would be harder.
Planning and Approvals Before Installation
Before installation starts, the project needs proper planning. This helps make sure the pool is safe, compliant, and suitable for the site.
Local approvals
Depending on the property and pool design, homeowners may need approval through the local council or a private certifier. This can include:
- Development Approval (DA)
- Complying Development Certificate (CDC)
These approvals help confirm the pool meets planning and safety requirements.
Engineering checks
Engineering plans may be needed to confirm that the pool can be installed safely in the selected location. These checks often look at:
- ground stability
- soil type
- drainage
- support for the pool shell
Soil testing and site surveys
Every block is different. Some Sydney sites have clay, some have sand, and some have rock or fill. A site survey helps confirm:
- pool position
- ground levels
- nearby structures
- underground services
This information helps the installer plan excavation and base preparation properly.
Drainage planning
Good drainage is important because water should not build up around the shell. Depending on the site, the builder may include gravel layers, agi pipe, or stormwater connections to move water away from the pool area.
Delivery and crane access planning
Because the shell arrives as one piece, the team also needs to plan:
- truck access
- crane position
- overhead clearance
- driveway or side access
Good access planning helps the installation run safely and smoothly on the day.
Site Preparation and Excavation
Once approvals and planning are complete, the site is prepared for the pool.
This stage usually happens in six steps:
- Mark the pool position.
- Excavate the area.
- Install drainage if needed.
- Prepare the base.
- Level and compact the base.
- Dig service trenches for plumbing and power.
Marking out the pool position
The team uses the survey and engineering plans to mark the exact location of the pool. This makes sure the pool sits in the right place and meets setback and clearance requirements.
Excavation
The excavation is made slightly larger than the pool shell, so there is room for the base, plumbing, and backfill. Soil may be removed from the site or stored temporarily before disposal.
Base preparation
The shell needs to sit on a stable and level base. Depending on site conditions, this may include:
- compacted road base
- crushed rock
- gravel bedding
- a concrete slab in some cases
Levelling and compaction
The base must be level and firm before the shell arrives. If it is uneven, the shell may not sit correctly. Installers use levelling tools and compaction equipment to make sure the base is ready.
Service trenches
Before delivery, trenches are prepared for plumbing and electrical conduits. This allows the services to be connected more efficiently after the shell is placed.
Delivery of the Precast Pool Shell
Once the site is ready, the pool shell is delivered to the property.
The shell is transported on a specialised truck designed for oversized loads. The delivery is usually timed to match the crane booking so the shell can be lifted into place soon after arrival.
During transport, the shell is secured to protect it from movement and damage. The team also checks the delivery route, overhead clearance, and access to the property before the day of installation.
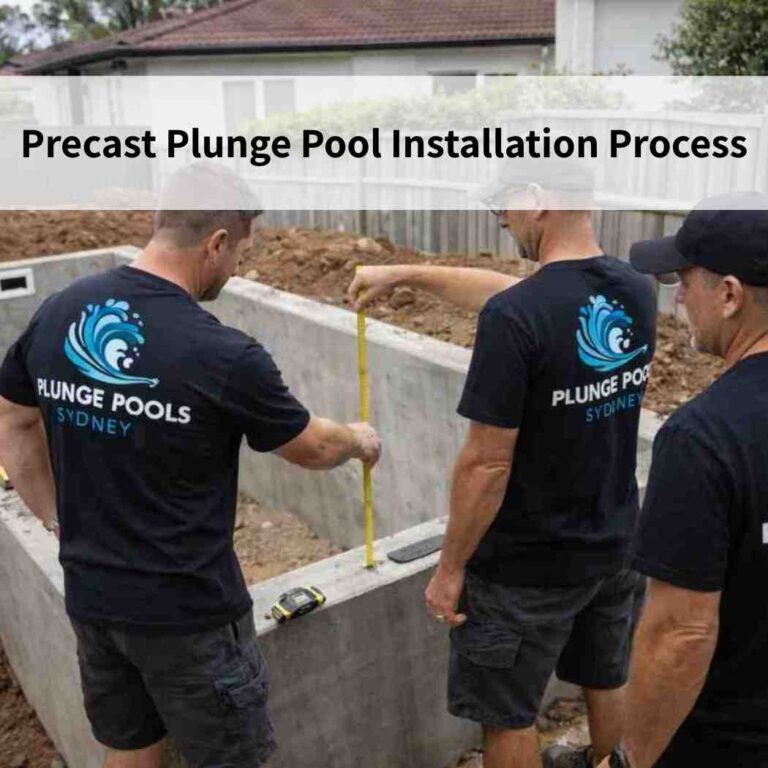
Crane Lifting and Pool Placement
On installation day, a mobile crane lifts the pool shell from the truck and lowers it into the excavation.
Crane setup
Before the lift starts, the crane is set up in a safe position with enough reach to access the excavation. The team checks:
- shell weight
- crane distance
- lifting angle
- ground stability
- overhead clearance
Rigging the shell
The shell is connected to certified lifting gear using its designated lifting points. This may include:
- lifting chains
- rigging slings
- spreader bars
The spreader bars help spread the load evenly during the lift.
Lowering the shell into place
The crane operator slowly lifts the shell, moves it over the excavation, and lowers it onto the prepared base. The ground crew guides the shell so it stays stable and lines up properly.
Levelling the pool
Once the shell is in place, the team checks that it is level in all directions. Small adjustments can be made while the crane is still attached. Once the shell is sitting correctly, the rigging is removed.
Safety during the lift
Only trained crane operators and rigging professionals should carry out this stage. The crew follows strict safety procedures and may delay the lift if weather conditions, especially wind, are not suitable.
Plumbing and Equipment Installation
After the shell is placed, the plumbing and equipment are connected.
Pool plumbing
The installer connects the plumbing lines to the fittings built into the shell. These usually include:
- suction lines
- return lines
- skimmer connections
- drainage points
The pipes run through the service trenches prepared earlier.
Filtration system
The equipment area usually includes:
- pool pump
- filter
- valves
- pipe connections
This system keeps water moving through the pool and helps remove dirt and debris.
Optional extras
Many homeowners also choose to include:
- pool heating
- salt chlorination
- LED lighting
- automation systems
It is often easier to install these during the initial build than later.
Electrical Installation
A licensed electrician completes the electrical work for the pool system.
This usually includes connecting:
- the pool pump
- pool lights
- control systems
- heating equipment is included
Because electricity and water are involved, this work must follow Australian safety standards.
Safety measures may include:
- RCD protection
- waterproof fittings and cabling
- electrical bonding where required
Backfilling Around the Pool Shell
Once the plumbing and electrical work are in place, the space around the shell is backfilled.
Backfilling is done in layers using suitable material such as:
- gravel
- sand
- crushed rock
- concrete backfill in some cases
At the same time, the pool is filled with water. This helps balance pressure on both sides of the shell and keeps it stable while the ground around it is rebuilt.
Each layer is compacted carefully to reduce air pockets and help support the shell properly.
Pool Coping and Edge Finishes
After backfilling, the top edge of the pool is finished.
Pool coping covers the joint between the shell and the surrounding surface. It helps protect the pool edge, improves safety, and creates a neat finished look.
Common coping and finish options include:
- travertine
- natural stone
- porcelain paving
- concrete surrounds
- tiled edges
Slip resistance is important around pools, so many homeowners choose textured or pool-rated materials for a more premium finish.
Pool Surrounds and Landscaping
Once the pool edge is complete, the surrounding backyard area can be finished.
This may include:
- paving
- timber decking
- composite decking
- lawn
- garden beds
- seating areas
- pergolas
- outdoor showers
In smaller Sydney backyards, the layout needs to use space well. The goal is to create safe walking areas, practical seating spaces, and a backyard that feels open and easy to use, turning the space into a relaxing outdoor oasis.
Pool Fencing and Safety Compliance
Before the pool can be used, it must have a compliant safety barrier.
In New South Wales, residential pools need a fence and gate that restricts unsupervised access, especially by children.
Common pool fence requirements
A compliant pool fence usually includes:
- a minimum fence height of about 1.2 metres
- a self-closing gate
- a self-latching gate
- a non-climbable zone around the barrier
Fence options
Popular pool fencing choices include:
- frameless glass fencing
- semi-frameless glass fencing
- aluminium pool fencing
Glass fencing is popular because it keeps the pool visible and helps small backyards feel more open. Aluminium fencing is also widely used because it is durable and cost-effective.
Final fence inspection
Before handover, the fence and gate must be checked to make sure they comply with safety requirements.
Water Filling and System Testing
Once the fence is in place, the pool is filled, and the system is tested.
Initial water fill
The pool is filled to the correct level for operation. During this stage, the installer checks that:
- The shell remains stable
- Water levels look correct
- plumbing connections stay sealed
Pump and filtration testing
Once the pool is full, the pump and filter are turned on. The team checks that:
- Water is circulating properly
- The pump is running smoothly
- There are no plumbing leaks
Water chemistry balancing
The water is then tested and balanced. This usually includes checking:
- pH
- chlorine
- total alkalinity
Balanced water helps keep the pool safe, clear, and easier to maintain.
Final Inspection and Handover
The last stage is the final inspection and handover.
Safety and compliance check
The installer or certifier checks that the pool meets the required safety and installation standards. This may include review of:
- pool fencing
- gate operation
- electrical safety
- general installation compliance
Equipment demonstration
The homeowner is shown how to use the pool system, including:
- pump and filter operation
- lighting controls
- valves and water flow
- chlorinator or heating controls if fitted
Maintenance guidance
The installer also explains the basics of ongoing pool care, such as:
- cleaning the pool
- emptying skimmer baskets
- checking filters
- testing water chemistry
Once the handover is complete, the pool is ready to use.
How Long Does a Precast Plunge Pool Installation Take?
A precast plunge pool installation usually takes between one and four weeks on site because the reinforced concrete pool shell is already manufactured before it arrives at the property.
Typical Precast Plunge Pool Installation Timeline
Day 1 to 2: Excavation and base preparation
The team marks out the pool, excavates the site, installs drainage if needed, and prepares the base.
Day 3: Delivery and crane installation
The shell is delivered and lifted into place by crane.
Day 4 to 7: Plumbing and electrical work
The plumbing, filtration equipment, and electrical systems are connected and tested.
Week 2 to 4: Fencing, finishes, and landscaping
The remaining work may include coping, paving, decking, landscaping, and pool fencing.
Every project is different, but many on-site installations can be completed within a few weeks once approvals and manufacturing are already sorted.
What Can Affect the Installation Timeline?
Several factors can influence how quickly a precast plunge pool installation is completed, including site access, weather conditions, council approvals, crane scheduling, and landscaping complexity.
Below are some of the most common factors that can affect the precast plunge pool installation timeline.
Site access
Narrow driveways, limited side access, or nearby buildings can make delivery and crane placement harder.
Crane availability
The shell lift depends on crane booking and timing.
Weather
Heavy rain can affect excavation and paving. Strong winds can delay crane lifts.
Council approvals
The project cannot move ahead until the right approvals and documents are in place.
Landscaping complexity
Detailed landscaping, decking, pergolas, or custom finishes may add time to the job.
Manufacturing lead times
The shell must first be made in the factory before delivery is booked.
What Factors Affect the Cost of Installing a Precast Plunge Pool?
The cost of installing a precast plunge pool depends on several factors, including excavation conditions, crane access, plumbing and electrical work, pool finishes, and optional equipment such as heating or automation systems.
Main cost factors include:
| Cost Area | What changes the price |
| Excavation | Soil, rock, slope, site access |
| Crane hire | Lift size, reach, crane access |
| Plumbing | Pipe runs, fittings, labour |
| Electrical | Pump, lights, controls, wiring |
| Finishes | Coping, paving, decking, landscaping |
| Optional extras | Heating, automation, LED lights, salt systems |
Because every property is different, most homeowners need a site inspection and a tailored quote.
What Challenges Can Occur During a Precast Plunge Pool Installation?
Several site conditions can create challenges during a precast plunge pool installation, including narrow access, sloping land, rocky soil, and underground utility services.
Below are some of the most common issues that may arise during a precast concrete plunge pool installation.
Narrow access
On tight urban blocks, the shell may need to be lifted from the street or front yard over the house.
Sloping backyards
Sloping sites may need adjusted excavation, retaining walls, or reinforced base preparation.
Rocky soil
Rock or very hard ground can slow excavation and may require specialised equipment.
Underground services
Water, gas, and electrical services must be located before digging starts so they can be avoided or managed safely.
What Maintenance Is Required After Installing a Precast Plunge Pool?
Maintaining a precast plunge pool involves regular cleaning, filtration maintenance, and water chemistry checks to keep the pool safe, clear, and operating efficiently.
Basic maintenance usually includes:
- skimming leaves and debris
- brushing the pool walls and floor
- emptying skimmer baskets
- cleaning or replacing filter elements
- checking water chemistry
Because plunge pools hold less water than larger pools, they are often easier to maintain.
Conclusion
A precast plunge pool offers Sydney homeowners a faster, more practical way to add a durable concrete pool to a smaller backyard. Because the shell is made off-site and installed as one complete unit, the process is usually quicker and less disruptive than a traditional concrete pool build.
With proper planning, excavation, crane access, plumbing, and finishing, a precast plunge pool can transform a compact outdoor area into a relaxing backyard retreat.
At Plunge Pools Sydney, we help homeowners through the full installation process, from planning and approvals to final handover. If you are thinking about installing a precast plunge pool in Sydney, contact Plunge Pools Sydney to request a free quote and get inspiration for your project.
FAQs
1. How long does a precast plunge pool installation take?
A precast plunge pool installation usually takes about 2 to 4 weeks on site once approvals and manufacturing are complete. Excavation, crane placement, plumbing, and finishing are done in stages. Because the pool shell arrives pre-built, installation is much faster than traditional concrete pools.
2. Do I need council approval to install a precast plunge pool in Sydney?
Yes, most precast plunge pool installations in Sydney require council approval or a Complying Development Certificate (CDC). These approvals confirm the pool meets NSW planning rules, including setbacks, drainage, and safety fencing requirements. A professional installer usually helps manage this process.
3. Can a precast plunge pool be installed in a small backyard?
Yes, precast plunge pools are specifically designed for small backyards. Compact sizes such as 2.5m, 3m, and 4m pools fit well in many Sydney properties. Their smaller footprint makes them ideal for urban homes where space is limited.
4. What access is required to install a precast plunge pool?
A precast plunge pool requires crane access to lift the concrete pool shell into the excavation. The crane may operate from the driveway, street, or front yard. Even properties with narrow side access can often install a pool using a crane lift.
5. What factors can affect the precast plunge pool installation timeline?
The installation timeline can be affected by site access, weather, crane scheduling, council approvals, and landscaping work. Difficult soil conditions or restricted access may also extend preparation time. Careful planning helps keep the installation process efficient and on schedule.